
By Steve Wright.
The entire point in shooting a good greenscreen (or bluescreen) is to get a good composite in post. Fussing over the lighting of the fleshtones at the expense of good lighting of the greenscreen is a very poor trade. With modern digital compositing tools and heroic rescue efforts even a poorly shot greenscreen can be made into a reasonably good composite, but it will take more time (schedule) and more money (budget) and the results will still not be as good as when starting with a well-shot greenscreen. The fleshtones can always be restored in post with color correction. The entire photographic objective of the backing region (whether green, blue or red) is purity of color (saturation), sufficient brightness, and uniformity so that the digital keyer can pull a good key. Following are tips from a compositor for shooting greenscreens for the best possible composite.
Blue vs Green
The choice of backing color may be dictated by the colors in the objects being filmed. If the foreground objects contain a lot of green then you must use bluescreen. If the foreground objects have a lot of blue then you must use greenscreen.
Skin tones work equally well with green or blue backings when using modern digital keyers.
Green is easier to light brightly than blue, requiring less light on the set.
Bluescreens lit by natural sunlight work well. Throw up a large diffusion silk to kill shadows if needed, or schedule an overcast sky for the day of the shoot.
Blue spill is less of a problem than green spill due to both its less offensive hue and its lower intensity. However, digital keyers have excellent despill tools that render this point moot.
The blue channels of both film and video have by far the most noise, so a bluescreen produces mattes with the noisiest matte edges.
The green channels of both film and video have low noise content so it produces the smoothest matte edges. However, in a greenscreen the grain from the blue channel can show up in skin tones from the despill operation.
Lighting & Backing
The number one issue is uniformity of lighting – within 1/2 stop of uniformity all over.
The number two issue is purity of the backing color. The photographed backing must be as close to 100% of its primary color with 0% of the other two colors as is technically possible. Of course, this is not technically possible. On a video waveform monitor in parade mode values of around 70% green and 20% each for blue and red would be excellent.
The brightness level should be about one stop under the key light. Two bad things happen with too much light on the backing. The backing looses purity (saturation) and it throws more spill onto the talent.
The careful lighting is only needed in the regions behind the talent. If they don’t go near an edge then don’t worry about the lighting there even if it is in frame. It can easily be garbage matted in post.
Tungsten lights on a properly colored backing can produce very good results.
Colored gels improve the purity of the backing color, but can be dangerous. They lower the light levels of the light sources and if they shine on the talent they add hideous spill problems.
Don’t use dimmers. They shift the color temperature of the lights towards red which reduces the purity of the backing.
Lighting & Talent
Light the talent for the intended background they are to be composited into – dark interior, sunny outdoors, high contrast, whatever. The talent lighting is independent of the backing lighting.
To set up the lighting for the talent, turn off the backing lighting. After the lighting is set up for the talent, turn the backing lights back on and re-meter.
Keep the talent 8 to 10 feet from the backing. The closer they get to the backing the more spill light lands on them.
Make sure the talent lighting does not hit the backing. Make sure the backing light does not hit the talent.
Watch out for reflective objects on the talent such as rings, belt buckles, etc. They will reflect the backing color and make that part of the key transparent punching a hole in the talent.
Never counter-light the edges of the talent with a complementary color of the backing (yellow for bluescreen and magenta for greenscreen). This is an out-of-date trick that is actually harmful with today’s digital keyers.
Do place small lights out of frame and slightly behind the talent to subtly rim light them. Having all the lights in the front quadrant introduces unnatural dark edges to the outline of the talent.
If a cove (cyclorama) is used then the talent will have to be lit with the same lights as the backing. Since the backing must be lit evenly that means that the talent will be lit bright and flat.
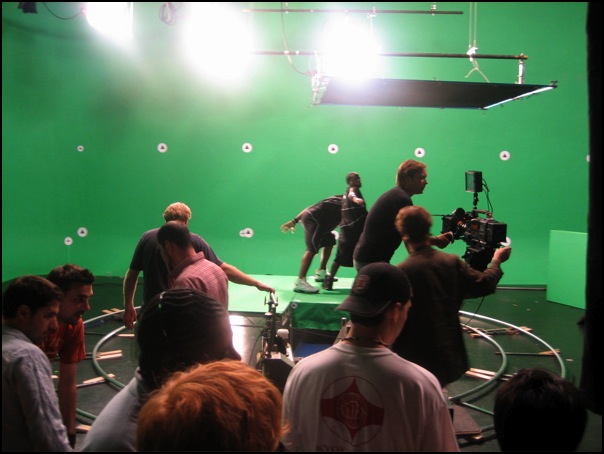
The Backing.
The backing might be made by painting a wall with special paint or the use of special colored fabric.
If paint is used it needs to be a specialty paint made for keying, not just any blue or green paint. More than one coat will probably be necessary to get uniform coverage. Watch out for glare spots on the paint.
If fabric is used it needs to be a specialty fabric made for keying, not just any blue or green fabric. It should not have any wrinkles, seams, or folds. If several panels must be used then they must be the same color and joined with matching colored tape.
The backing need not fill the frame, just the area behind the talent. It can be easily fixed in post with a garbage matte. Make certain that the talent does not go off the backing, of course, or you will endure some extra costs for rotoscoping.
Floors.
Green screen floors are often necessary to key the talent all they way to their feet, but they introduce two problems:
1) A great deal of green light will bounce from the floor up to the talent causing spill problems for the key.
2) Walking on the painted surface scuffs and discolors it making the key more difficult to pull in post. Care must be taken on set to keep the floor as clean as possible.
A reflective mirror (such as Mylar) on the floor that reflects the backing will create a green floor without any “up-spill” onto the talent. However, the trade-off is that the talent’s reflection will have to be removed in post.
Film Issues.
The finest grain film stock possible should be used. Grain becomes exaggerated in the keying process and can introduce noise problems in the matte edges or in the despilled regions.
Never use a filter on the camera as it will degrade the quality of the digital matte. Filtering can always be applied to the finished composite.
It’s expensive, but Kodak’s SFX 200 film stock is made specifically for greenscreen and bluescreen photography and produces superior results.
16mm is not pin registered and has gate weave which is bad for compositing as the layer will drift around when composited. However, this can be solved in post using an image stabilizing program.
16mm has much larger grain structure than 35mm film which can create mattes with noisy edges.
Video Issues.
Video cameras all have an “edge enhancement” feature to artificially sharpen the picture. This introduces edge ringing artifacts that flummox the keyer. Turn off all edge enhancement in the camera. If the picture needs sharpening it can be added during compositing.
Do not shoot greenscreens with DVCAM. They have both low sampling in chrominance (the very basis of a good key) plus they compress the video data heavily which adds compression artifacts that further insults the keyer.
Shoot greenscreens with 4:4:4 or 4:2:2 video cameras with as little compression as possible, preferably none.
Photography.
Shooting a clean plate of the backing screen is very helpful to the compositors in post. If the camera is moving this is not practical. However, if the camera is locked off or it is a motion control shot then it should be done.
For motion tracking shots make sure that there are at least 3 tracking markers visible in frame at all times, preferably more. Watch out for the talent covering up too many of the markers.
Tracking Markers:
1) Make tracking markers shaped like a “+” (plus sign). This gives strong vertical and horizontal edge for the motion tracker to lock onto.
2) Don’t let them get too small in frame. You should still be able to see that their shape in the final photography, rather than just a fuzzy blob.
3) Their color is not important as they will most likely be painted out anyway. If they are to be keyed out, then make them either green or blue, whichever is not the backing color.
Useful Links.
Steve Wright’s web site: www.swdfx.com
Steve’s digital compositing books on Amazon.com:
Compositing Visual Effects: http://www.amazon.com/exec/obidos/ASIN/0240809637/wwwswdfxcom-20
Digital Compositing for Film and Video: http://www.amazon.com/exec/obidos/ASIN/024080760X/wwwswdfxcom-20
No comments:
Post a Comment